Custom Nunjucks tag

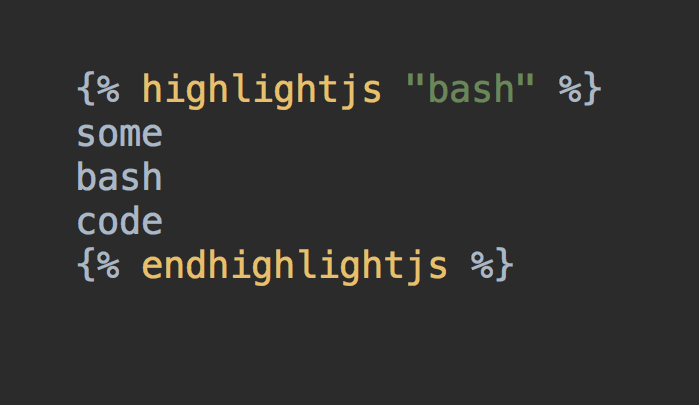
When using the Nunjucks JavaScript template engine you may want to add a bit of functionality. Adding a filter is relatively straight forward, but quite limiting. A basic tag would help in many instances, unfortunately that isn't as simple. Here we'll look at adding a basic tag to Nunjucks.
Custom tag
To add custom functionality to the Nunjucks engine you can add a custom extension. For a simple tag this is very much overkill. But unfortunately as far as I can tell, there is no easy API to create a tag. So we'll look into using a dumbed down version of this documented custom tag.
The goal is to have tag that can do syntax highlighting of a piece of code. The syntax parsing and styling is done by the superb library: Highlight.js. I'm going to limit this post to the rendering side of the story, but don't forget to include the Highlight.js CSS files in order to actually admire the results.
Highlights.js tag
In this post we'll look at a tag with a body and a single argument. The body will contain our code to highlight and the argument is the language to use.
So the following Nunjucks template:
{% highlightjs "js" %}
console.log('hello world');
{% endhightlightjs %}
Is transformed into:
<pre><code class="hljs language-js">
<span class="hljs-built_in">console</span>.log(<span class="hljs-string">'hello world'</span>);
</code></pre>
We'll start by defining a function and adding it as an extension to Nunjucks:
function HighlightJsExtension() {
    ...
}
yourNunjucksEnv.addExtension('HighlightJsExtension', new HighlightJsExtension());
Inside our function will indicate which tags this function should parse:
this.tags = ['highlightjs'];
Now comes the tricky part, parsing.
We'll first look at the actual business logic of this piece of code.
This run method:
this.run = function (context, language, bodyCallback) {
  const rawCode = bodyCallback();
  const code = hljs.highlightAuto(rawCode, [language]);
  const html = `<pre><code class="hljs language-${language.toLowerCase()}">${code.value}</code></pre>`;
  return new nunjucks.runtime.SafeString(html);
};
The run function will call Highlight.js on the body of the tag and wrap in into a code block.
this.run is called from the this.parse function.
The parse function is way to low level for our need. It will go over the block token by token. All we really need is the to get the tag argument (the language), the body and finally call the run function. To achieve that with this low level logic use:
// Parse the args and move after the block end.
const args = parser.parseSignature(null, true);
parser.advanceAfterBlockEnd(tok.value);

// Parse the body
const body = parser.parseUntilBlocks('highlightjs', 'endhighlightjs');
parser.advanceAfterBlockEnd();

// Actually do work on block body and arguments
return new nodes.CallExtension(this, 'run', args, [body]);
Full code
These are all the pieces needed to add a basic tag to the Nunjucks engine.
Putting it all together, with the following code we now use the new tag to highlight the code in our output.
//
// Allows highlighting of code blocks in Nunjucks template.
// https://mozilla.github.io/nunjucks/api.html#custom-tags
//
const nunjucks = require('nunjucks');
const hljs = require('highlight.js');

function HighlightJsExtension() {
  this.tags = ['highlightjs'];

  this.parse = function (parser, nodes) {
    const tok = parser.nextToken();  // Get the tag token

    // Parse the args and move after the block end.
    const args = parser.parseSignature(null, true);
    parser.advanceAfterBlockEnd(tok.value);

    // Parse the body
    const body = parser.parseUntilBlocks('highlightjs', 'endhighlightjs');
    parser.advanceAfterBlockEnd();

    // Actually do work on block body and arguments
    return new nodes.CallExtension(this, 'run', args, [body]);
  };

  this.run = function (context, language, bodyCallback) {
    const rawCode = bodyCallback();
    const code = hljs.highlightAuto(rawCode, [language]);
    const html = `<pre><code class="hljs language-${language.toLowerCase()}">${code.value}</code></pre>`;
    return new nunjucks.runtime.SafeString(html);
  };
}

const TEMPLATE_DIR = './template/';
const templateLoader = new nunjucks.FileSystemLoader(TEMPLATE_DIR);
const env = new nunjucks.Environment(templateLoader);
env.addExtension('HighlightJsExtension', new HighlightJsExtension());
[see gist]
Example usage of Nunjucks tag in template:
{% highlightjs "bash" %}
read -p "Are you sure? " -n 1 -r
echo    # (optional) move to a new line
if [[ ! $REPLY =~ ^[Yy]$ ]]
then
exit 1
fi
{% endhighlightjs %}
The Nunjucks render function will transform the template into:
<pre><code class="hljs language-bash">
<span class="hljs-built_in">read</span> -p <span class="hljs-string">"Are you sure? "</span> -n 1 -r
<span class="hljs-built_in">echo</span>    <span class="hljs-comment"># (optional) move to a new line</span>
<span class="hljs-keyword">if</span> [[ ! <span class="hljs-variable">$REPLY</span> =~ ^[Yy]$ ]]
<span class="hljs-keyword">then</span>
<span class="hljs-built_in">exit</span> 1
<span class="hljs-keyword">fi</span>
</code></pre>
And if use this HTML on your web page, you will get:
read -p "Are you sure? " -n 1 -r
echo    # (optional) move to a new line
if [[ ! $REPLY =~ ^[Yy]$ ]]
then
exit 1
User-defined templates warning
Using these code snippets I hope you can easily construct your own Nunjucks tags.
Do note that we've assumed that the template is safe. If a user can insert code somewhere in your template, you will need additional security measures (not provided here). See this warning in the Nunjucks doc.