Raspberry Pi NoIR camera marker tracking
There is a variant of the Raspberry Pi camera without an infrared (IR) filter. This allows imagery in low light situation and can capture images outside of the human vision. We'll take a detailed look at the Raspberry Pi NoIR Camera V2. This post is part of a series using the NoIR Raspberry Pi camera to create a basic marker tracking setup.
Note, this project is inspired by the wonderful project done by someone one hackaday.io.
Tracking
Tracking the position of an object over time using a camera feed is quite a difficult process. The NoIR camera should make this a bit easier by shining IR light on the object in question and using retroreflective markers. And with the introduction of the new Raspberry Pi 4 we should have plenty of processing power to combine high framerates with processing on the Pi itself.
Setup

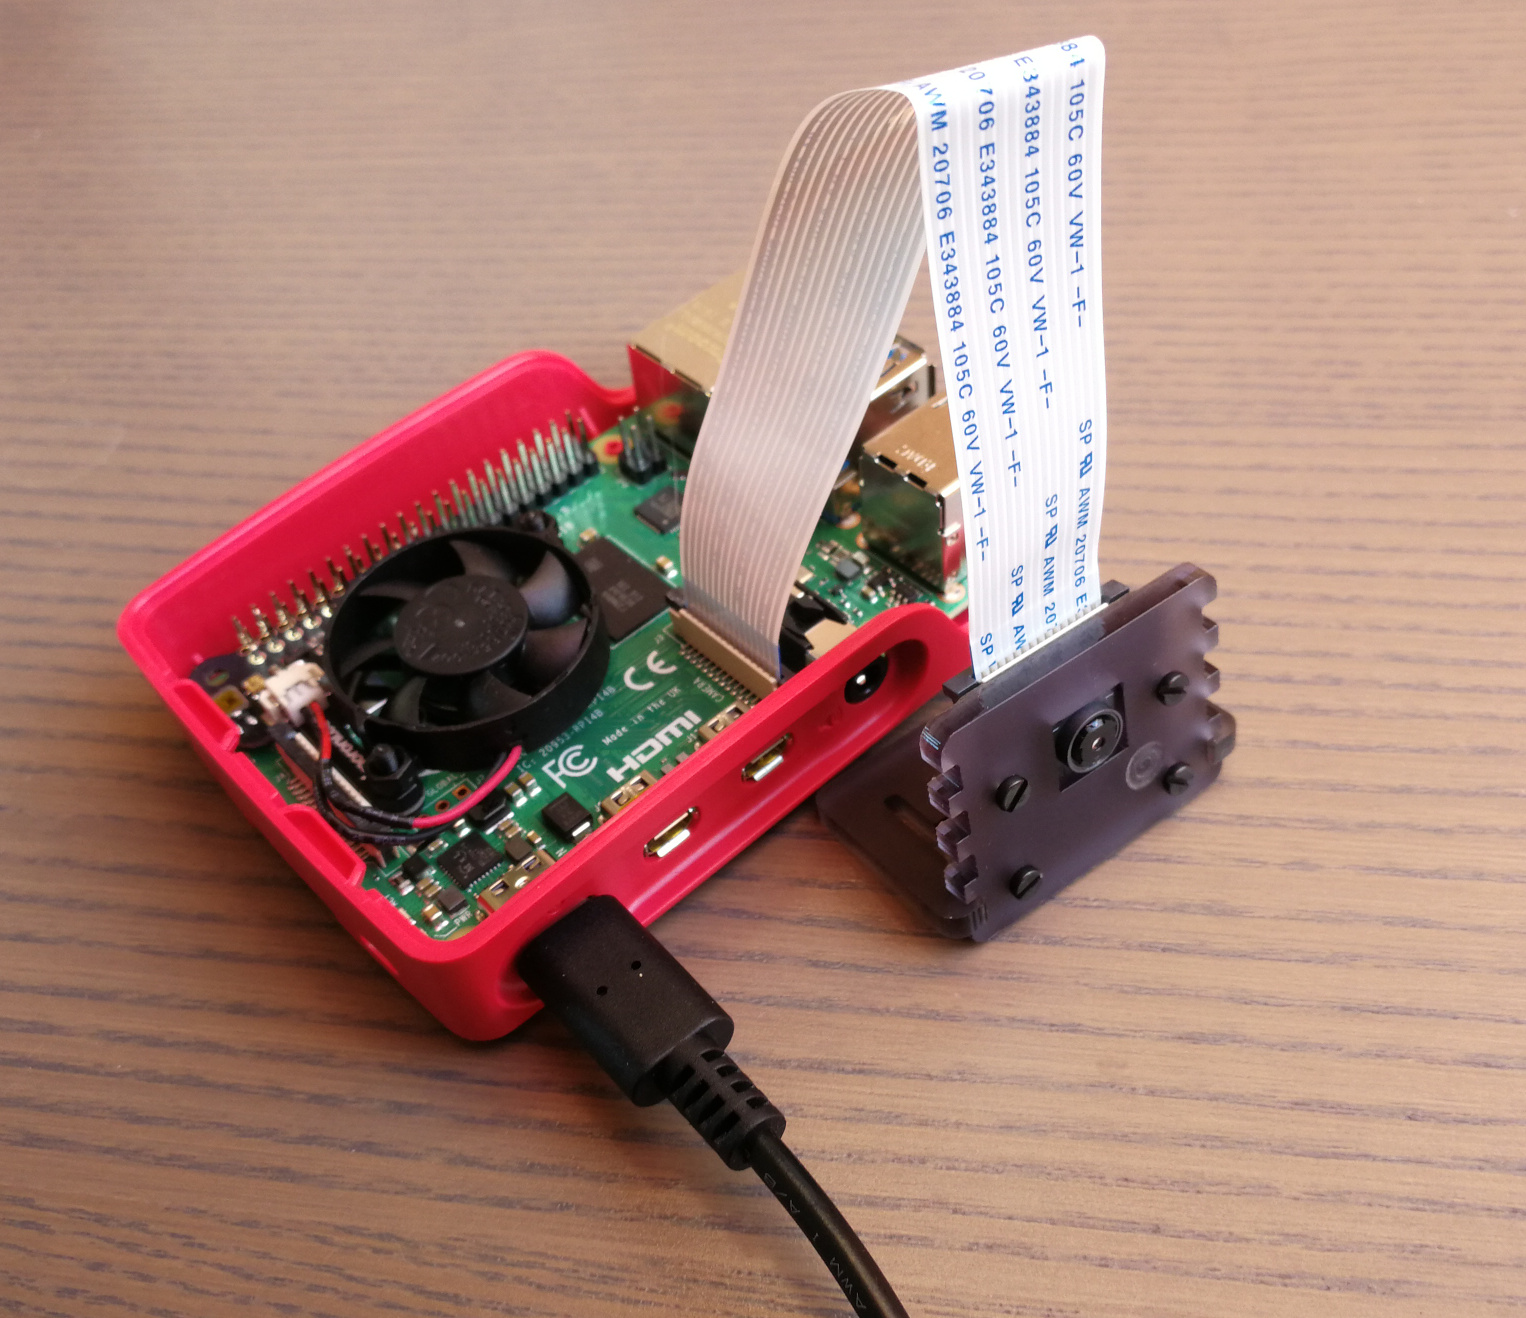
The setup comprises a Raspberry Pi 4 equipped with the Pimoroni Fan SHIM and Pi camera.
Camera
The camera is a Pi NoIR Camera V2.
The name is quite confusing, the NoIR part means there is no infrared filter. So the camera is actually capturing infrared light. As opposed to the Regular Pi Camera V2 module that does not sport the NoIR badge, but actually does not capture infrared light... Other than the IR filter the two versions seem to be identical.
Look here for detailed specs.
Resolution & FPS
The Pi Camera can both shoot some fairly detailed still images and has pretty decent high frame rate video. The camera view is pretty limited, 62.2 degree diagonal angle of view. Still images can go up to 3280 by 2464 pixels. Video frame rate can go to an advertised 90fps (though people have gotten insane frame rates out of this thing).
Most of the processing is done by either the camera chip or the GPU allowing the CPU to be used for further processing (See this StackOverflow comment).
One of the confusing things about this camera is all the internal capture modes. In some cases the field of view (FoV) may shrink (partial FoV), perhaps unexpectedly chopping of parts of the image. We'll briefly look at the workings here, but in general expect to do some research for your specific use case.
For many experiments we'll use the Python Picamera library. The library has an excellent explanation on the different camera modes and effects.
The library does most of the work for us by selecting a camera mode. The native sensor has an aspect ratio of 4:3. Deviating from that aspect ratio will likely result in a partial FoV.
Next a mode with a resolution close to the requested resolution is requested, favoring downscaling over upscaling. Downscalling is done by both the GPU and by the camera chip using "binning". The binning process is basically a downscaling done at the hardware level. Having the benefit of great speed along with noise reduction.
You can see the effect of the different field of views in the following image:
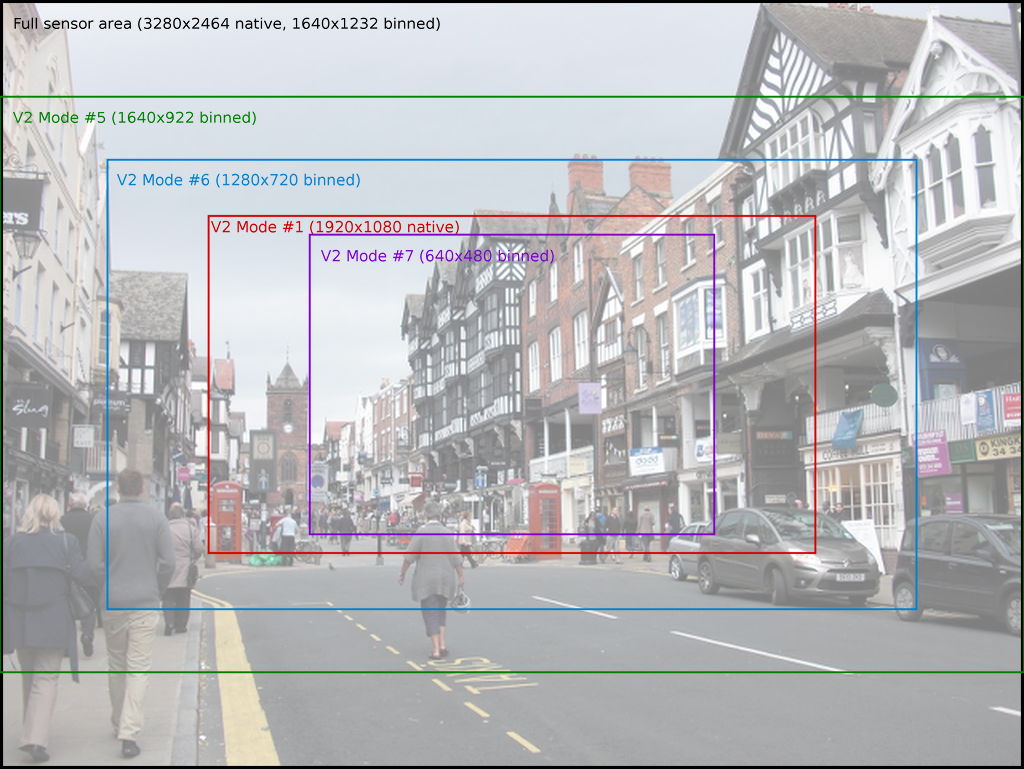
One important thing of note is that you can set the mode manually. Picking a full frame camera mode and letting the GPU and camera chip do down sampling for you. This way you get the full FoV without sacrificing CPU usage. Again see the comment on StackOverflow.
Resolution table
All the resolutions, mega pixels and names like 720 & 1080p can get confusing pretty quickly. I made a small table which you might find handy.
| Resolution | Mega pixels (rounded) | Name | Max (advertised) frame rate | |
|---|---|---|---|---|
| 320 | 240 | |||
| 640 | 480 | 90 fps | ||
| 800 | 600 | |||
| 1024 | 768 | |||
| 1280 | 720 | 720p | 60 fps | |
| 1280 | 960 | |||
| 1920 | 1080 | 1080p | 30 fps | |
| 1536 | 1180 | |||
| 1600 | 1200 | |||
| 2048 | 1536 | |||
| 2240 | 1680 | |||
| 2560 | 1920 | 5 | ||
| 3280 | 2464 | 8 |
IR filter effect
The effect of having no IR filter causes all images to have these weird looking colors with normal daylight.
For example, here is a picture of my cats:
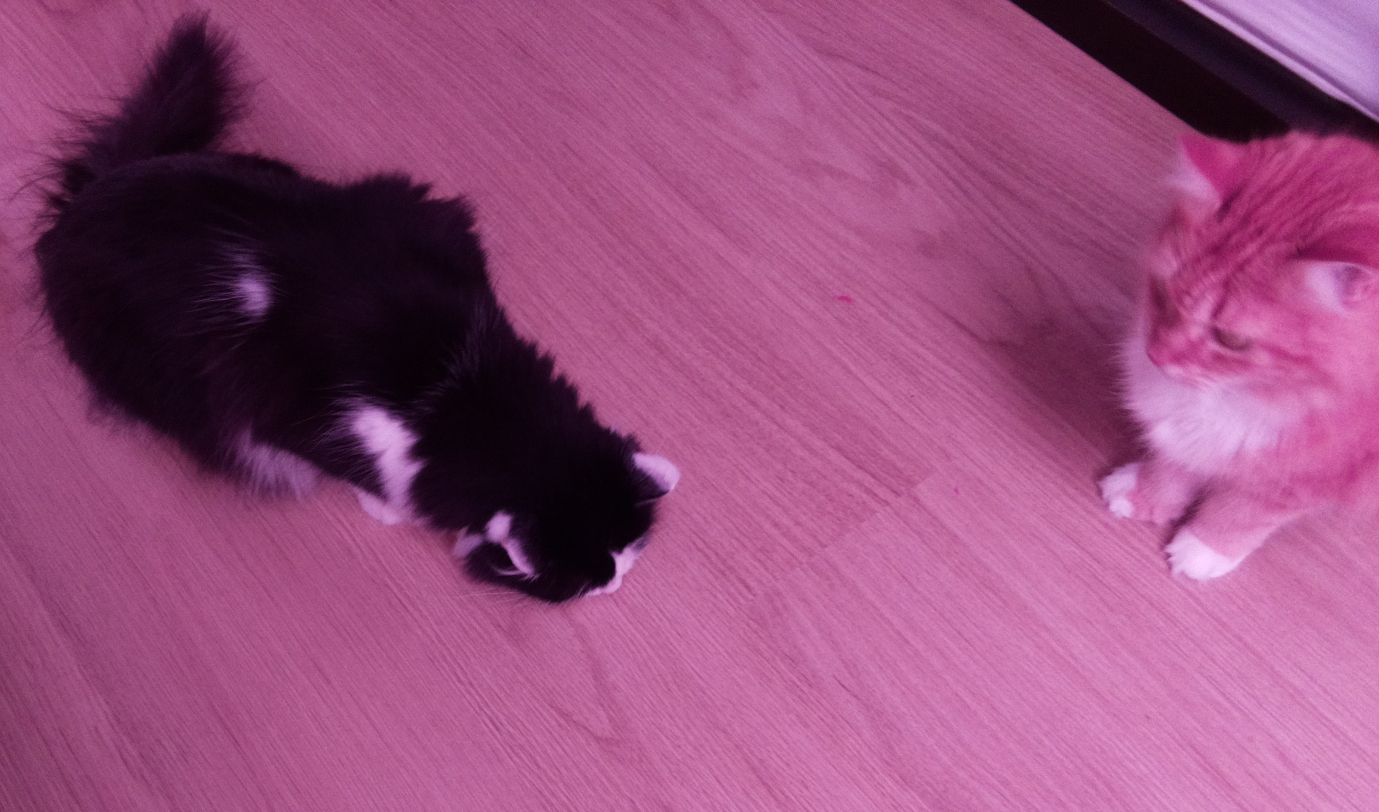
In real life, one is black/white while the other is red/orange. The camera however transformed everything except black but black to a more purplish-ish tint.
I only have a NoIR camera to work with so I can't give you a normal version camera shot. To see side by side comparison see this blog post.
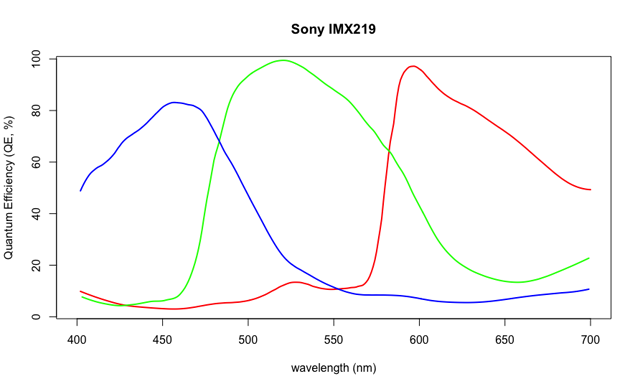
While these distorted colors are expected, I was expecting only reds to be overly present in the image. The resulting color we are getting is predominantly red, but also more green and blue. To explain this, let's look at what is going on with the sensor.
The camera sensor is the Sony IMX219 sensor. The CMOS sensor captures red, green and blue wave lengths, just like the human eye. The red, green and blue sensors would also capture IR light, if not for the infrared cut filter installed in normal cameras.
The Raspberry Pi camera with IR cut filter has the following response curve:
Which closely matches the human spectral sensitivity:
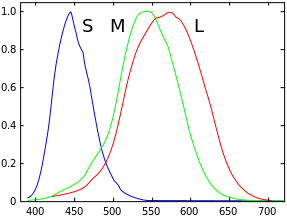
Infrared light at wave lengths from 700nm and up are hardly sensed with the normal Pi camera. Without an infrared filter all the sensors pick up the infrared light. Here is the spectogram of a different CMOS sensor (couldn't find NoIR Pi camera graph):
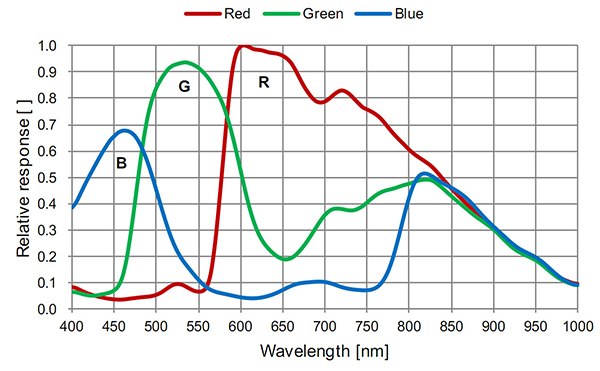
This of course has the desired effect for our task of tracking an marker using IR light.
Concluding
The NoIR V2 camera should be able to get high frame rates with decent resolution in the infrared spectrum. With the processing happening mostly on the camera chip and GPU combined with the powerful Pi 4 there should be plenty of power for further processing.
Next we'll try recording high frame rates.
Related
This post is part of the project Raspberry Pi marker detection
- Next post: Picamera realtime high fps processing